Pages

Friday, 28 September 2018

Planner Friday - September

Hello, it is Planner Friday again over on the Trendy Twine blog.  Please stop by and say hi!

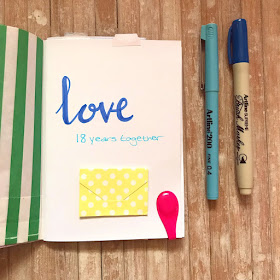
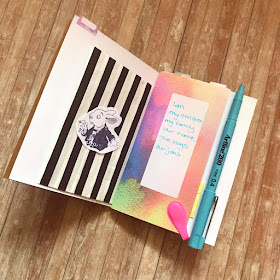
Hands up, who is excited for October and Halloween!  I am!  This month I am setting up a couple of journalling pages in my travellers notebook to record all the spooky fun we are going to have over the next few weeks.  


Used but not pictured: Clear stamp block

October is one of my favourite months, the schools break up for a week, there's a ton of horror films on the TV and well, there's a lot of fun candy and treats to eat!  I started off by adding some washi tape to my pages and then glued in a mini calendar and mini index card so I can document anything I want to remember.  I also wanted to create some space on the other page for memories and a photo of us all dressed up for Halloween so I used some stamps from the Documenting The Everyday set.


Sweetie stamp from the Foodies set

Then it was time to break out my Happy HalloweenFoodies and Hello Fall stamp sets to add some decoration!

You can read the rest of my post here.


Monday, 24 September 2018

Artline Monday - Thinking of you week

Today is the start of Thinking of you week so there's no better time to grab your pens, paper and greeting cards and spread a little cheer!  If you aren't familiar, Thinking of you week is all about letting people know you care by sending them a card or letter to brighten their day!


Thinking of you

Last year I wrote about different ways you can join in with the fun so if you are looking for some ideas you can check out that post here.  I thought for today's post I would give you some writing prompts in case you want to get involved but have no idea what to actually write!  Sometimes looking at a blank piece of paper makes my mind go blank too, writers block is a real thing!

Favourite memory

What is your favourite memory of the person you are writing too?  Would it make them smile to remember the day you first met or became friends, a holiday you shared together or an event you went to?  Was there something funny that happened when you were together that still makes you laugh whenever you think about it now?  Remind the person you are writing to about these stories.

Compliments

How lovely would it be to receive a note or card in the mail telling you something nice about yourself?  What is the best thing about your friend or family member, are they kind, joyful, strong or brave?  Do they have nice eyes or fantastic hair?  How does having them in your life affect you?  Why are you thankful for them?

Recommendations

Have you found a recipe you think they would like to make, cut it out and add it to your letter.  Have you read a good book or is there a piece art you love or a poem you would like to share?  Have you started watching a TV show you think they would enjoy or taken up a new hobby, let them know about it.

Share why

Out of everyone you could have written to, why did you decide to write to this person?  Do you miss them, do you want to arrange getting together again soon, are they your best friend or favourite family member?  Tell them!

Congratulate

Has something good happened to them recently?  Did they pass an exam or a test?  Have they gotten a new job, home or pet?  Or has something good happened to you?  Share it with them.

Your notes, letters and cards do not have to be overly long so don't feel like you have to write pages and pages, I am sure whatever you choose to write will be appreciated!


Decorating the envelope

If you want to make your envelope look a little special so it will stand out against the leaflets and bills when it is delivered you can decorate it.  I like using kraft colour envelopes and writing on them with my white calligraphy pen.  You can write the recipient's name and address as fancy as you like as long as the door number and postcode are clear so it is easy to deliver.  If you like metallic colours then you should try the Artline Supreme markers as they come in lots of different shades and won't run if they get wet as the ink is permanent.

Treats to add to your letter

You could add a small treat to your letter or card if you like, little things like pocket size notebooks, pens, postcards, bookmarks, tags and stickers will all fit easily through the letterbox and not weigh very much.  You could also add a tea bag or sachet of coffee for the person to enjoy while they read your note or a sweet treat to nibble on.  Think of this as an optional extra though, the main idea is to spread happiness through putting pen to paper so don't feel obliged to add anything else!

I hope you receive something nice in the mail this week!


Tuesday, 18 September 2018

Happy Cute Surprise Bag review and giveaway

Have you heard about Happy Cute It is a website that sells the sweetest products, from stationery to plushies, squishies, homeware and accessories plus so many things in between so if you like cute and kawaii things you should definitely go and take a peek at what they have to offer!  One of their products is a Surprise Bag which I have been sent to review for you today and if you would like to win one for yourself then fill out the widget at the bottom of this post to enter!

Happy Cute Surprise Bag

The Surprise Bags contain at least 15 items which are selected at random from the HC warehouse and cost approx £14.50 each including free shipping or if you want your parcel to arrive a bit quicker you could pay extra for a faster service.


Reverse side of the bag

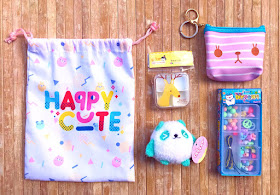
The products come in a nice little drawstring bag which is chock-a-block full with goodies so let me show you what was in there!

Sweet box, purse, plushie & bead making kit

There was just so many things inside this bag that I loved!  The mix of products was good too, there were practical things like purses, socks and pocket mirrors as well as fun things like hair accessories, keychains and plushies.  The bead jewellery making kit provided an afternoon of crafting fun for my girls and they also nabbed the hair bow, clips and hair ties from me too!  

There were 15 items in my bag which means they all cost less than £1 each which is a real bargain!

Mirrors, hair accessories, keyrings, socks, bracelet & plushies

My absolutely favourite product is the rainbow alpaca, I have wanted one of these for such a long time so when I found this at the bottom of the bag I might have let out a little squeal!  It is all of my favourite things, pretty, plush, pastel and practical because it is a purse as well as a cute toy!  There is also a slot on the back to hold a bank card or travel pass and the key ring on the top is attached to an extendable cord making it super handy.

Okay, so if this bag is right up your street then pop your details below to enter the giveaway!  The more actions you complete the more entries you will receive!

She's Eclectic Happy Cute Shop Giveaway

If you have any questions about the bag let me know and I will try and help, oh and good luck!


Monday, 17 September 2018

Artline Monday - World Gratitude Day

World Gratitude Day is celebrated on the 21st September every year and it is a day to reflect on the things you are grateful for and appreciate about your life.  Focusing on what is good is a great way to stay positive and improve your mood so I thought for today’s post I would show you how to make a little gratitude journal to carry around with you so you can record what makes you happy and grateful.

Supplies and Artline pens

The basic idea behind this is a junk journal, we are going to make one out of scraps of paper, envelopes, paper bags and any little bits and pieces you have laying around.  You will also need some nice pens like my Artline brush markers and fineliners.

First of all you need to find something to make the cover of your journal.  I am using a card a friend sent me but you can use some pretty card or thick paper, just fold it in half to create your book shape and then look for things to fill it with to make the pages.  I have some sheets of patterned paper, old postcards, envelopes and a couple of paper bags I have kept in my craft supplies box that I am going to use in mine.  If you have an old book that is falling a part and heading for the recycling bin then you could take some pages from that to use in yours too.
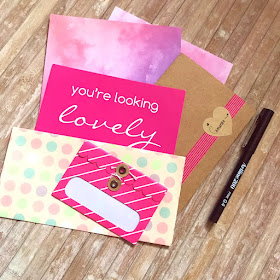
Postcard, papers and envelopes

Put all your pages in the cover and fold them inside as if you were closing your book, then trim any overhanging pieces so the papers fit inside the journal.  It doesn’t matter if any pages are smaller than others, a junk journal doesn’t have to be perfect.  If you do use any paper bags or envelopes make sure they fit inside the cover without having to cut the sides and that you have the opening end facing the top of your journal so anything you pop in them won’t fall out.  I have also cut the folded tops off my envelopes so it’s not fiddly to put things in them.  I think I will use these pockets to store things that make me happy and remind me of good times like tickets to a trip we have been on or receipts for a nice meal we shared etc.  You can also write on the outside of the bags and envelopes as if they were pages inside the book too.
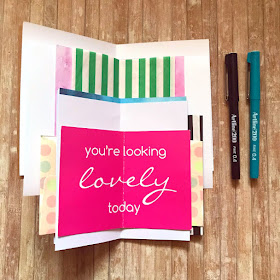
Arranging my pages

There are a few different ways you can bind your book, just do whichever is easiest for you.  You can staple them into place along the middle of the centre page or sew a couple of stitches with a large needle and thick thread.  I used a piece of elastic to secure mine placed along the centre fold and tied tightly around the outside of the cover. I cut two small slots at the top and bottom of the spine of my journal to hold the elastic into place and then trimmed off the excess elastic from the knot.
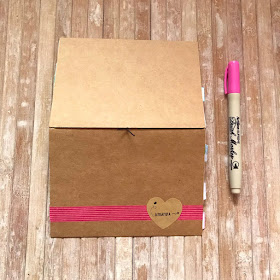
Securing the pages with elastic

Here is the view from inside my journal...
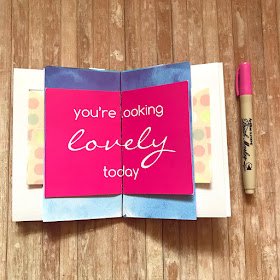
The elastic holds everything in place

To make the journal look a little neater I hid the knot on the spine using a kraft coloured sticker and it will also hold the elastic in place.  You wont need to do this if you stapled or sewed your pages. 
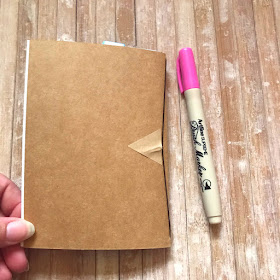
Hiding the knot

Now you have made your journal you can add some extra decoration to it!  I used a brush marker to write on my front cover. 
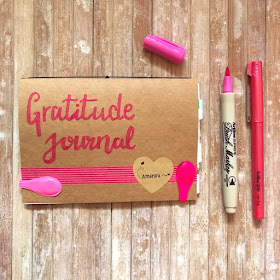
Writing on the cover

Then it's time to fill your journal with things to make you smile, pictures, doodles, quotes, memories and the things you are grateful for!
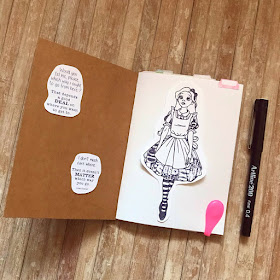
My first page

Happy memories

List of things I am grateful for

There is still plenty of space left inside my journal so I am going to carry it in my bag and jot down any things that make me happy and if I am having a bad day I can take it out and look at all of the things I am grateful for and hopefully improve how I am feeling.

I hope you like my idea and please let me know if you are going to make your own gratitude journal!


Monday, 10 September 2018

Artline Monday - Roald Dahl Day 2018

Ever since I was a child I have absolutely loved Roald Dahl's books so I couldn't let Roald Dahl Day go by without doing something special to mark the occasion!  It falls on his birthday, the 13th September and it is a day to celebrate the wonderful characters and worlds he created and the love of reading he inspired and is still inspiring in generation after generation of children.     

There are so many great Roald Dahl books that is hard for me to choose a favourite but I have always loved this quote from The Twits so I thought it would be nice to write it in my notebook using my fineliners and Artline Supreme brush markers as a little reminder to be kind and have good thoughts.

Roald Dahl quote with Artline Supreme brush markers

Mixing different styles of lettering, pens and colours creates an interesting look and adding extra outlines, swirls and spots shakes things up a little too! 

Okay, now let's move on to the craft project I have for you today, we are making dream jars from the BFG!  If you remember the BFG is a big, friendly giant who makes nice dreams for children by mixing good things together, capturing them in a jar and then blowing them into the ears of sleeping children using his special dream blower.  These jars will also make a sweet nightlight for little ones who are afraid of the dark as well as being fun to make! 

You will need:
  • a glass jar - storage, mason or an empty jam/pickle jar
  • Artline poster and/or paint markers
  • stickers for decoration
  • LED tealights
  • Glitter glue or glitter paint (optional)


Supplies

In the book the dreams look like little colourful clouds and when they are caught in the jars they shimmer and shine which is why I added the LED tealights to mine to make them look extra magical but before we get to that part we have to decorate the outside of our jars.

Adding colour with my poster marker

You can decide with your children what kind of colours and design they would like on their jar, I started by painting the bottom of mine with one of the poster markers and then added some big, glittery flower stickers.  

Embellishing around the stickers

The base dried very quickly and then I used more poster and paint markers to create a whimsical pattern around the jar.  Both sets of pens work really well on glass and will stay in place once they are dry.

Drawing flowers

When my pattern was finished I wanted my jar to look more cloudy and less see through so I painted the inside of the glass with gold glitter paint (but you can use glitter glue if you like) and then left it dry.  
Pink and flowery dream

The last step was to turn on the LED tealight, pop it inside the jar and put the lid on.  Because the tealight is so small and battery operated the jar will not get hot whilst the light is on so it is safe to use overnight.

For my second jar I decided to deviate from the description in the book and I drew a woodland scene instead.  Again I used the poster markers to decorate the jar and this time I added some cute animal stickers too.

Creating a scene 

I think it looks like a perfectly nice dream to have!  

Woodland dream

Here are my finished dream jars, I can't wait to see how they look tonight in a darkened room with the lights flickering inside them!

My dream jars

I shot this short video of the jars with the lights on so you can see how they look when they are finished and lit up.


Please let me know if you have a go at making your own dream jars, I'd love to hear how you got on!  Also if you are on Facebook or Twitter tell us how you will be celebrating Roald Dahl day, you can find Artline here and here and I'm @Shes_Eclectic.

Thanks for stopping by!

Monday, 3 September 2018

Artline Monday - Great British Bake Off fun and photo props

The Great British Bake Off started again last week and I am so excited to get to know all the new contestants.  My girls and I gather together on the sofa every Tuesday to watch the show and it has become a really big thing in our house (just for us girls though, the boys aren't interested)!

When we first started watching it the food always made us hungry so I started making sure we all had a drink and snack ready before each episode began but over the years this had evolved to something a little, well, you might say.... crazy!    

Menu for our Bake Off evening

You know those cafes with the fancy chalkboards that someone lovingly writes the menu or specials on?  Well I brought a little A4 size one for our GBBO evenings!  I use an Artline chalk marker to create the menu and then I stand the board up on the coffee table for when my girls get home from school so they can see what I have brought or made for us to eat while we watch the show!  It just adds an extra element of fun to the day and makes us look forward to Tuesdays a little more!  

I don't just use the board and markers for Bake Off though, they are great for photo props too!  Milestones, birthdays and events can all be written on the board and then held or added somewhere to the photo you are about to take.  I have been designing one for when the children go back to school in a couple of days and because the markers wipe off easily with a damp cloth if I don't like how something looks I can just wipe it away and start again! 

Vibrant chalk markers

The chalk markers are so much more vibrant than regular chalk so they really stand out against the black background and look great in photographs.

Back to school photo prop

I think I am going to do something like this for Wednesday's back to school photos, it just depends on whether I take a pic of my kids all together in their new uniforms or individual shots.  If I do get individual ones I can wipe out the year number and change it for each photo (or set of photos, I like to take a lot of pics!).

So do you like the sound of my GBBO evenings?