Is it raining where you are? I feel like we've had nothing but rain for weeks and we have been stuck inside, dreaming of summer! As it was half term and my girls were home with me we decided to make some summer themed #ArtlineRocks to distract us from the weather and for us to hide at the beach when next go.
 |
| I scream, you scream, we all scream for.... |
One rainy afternoon last week we divided up the rocks I had left over from our previous rock painting adventures and I got out our Artline pens. We find these ones work the best on stones:
- Artline Poster and Paint markers
- Artline Supreme permanent markers
- Artline 853 OHP markers
- Artline 900xf metallic markers
Because our rocks are white they didn't need a base coat, if you have darker coloured rocks and stones then it is easier to give them a coat of paint before you start so you have a lighter surface to work on.
My youngest decided to paint the sea on her first rock and a lovely bright yellow sun. When it was dry she added some details using the Artline 853 OHP pens and a white paint marker for the waves.
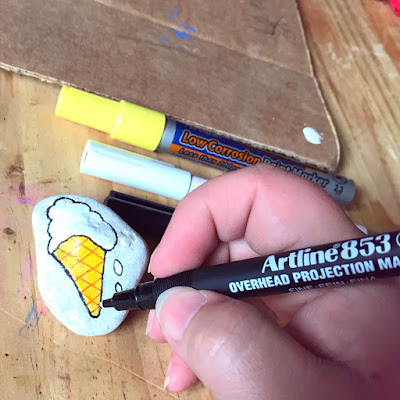
I had a bit of an odd shaped rock to work with so I turned it into a ice cream cone.
When the paint had dried I added raspberry sauce with my pink Artline Supreme marker and the waffle pattern to the cone with an orange 853 OHP pen.
 |
| Painting the sea with a poster marker |
My youngest decided to paint the sea on her first rock and a lovely bright yellow sun. When it was dry she added some details using the Artline 853 OHP pens and a white paint marker for the waves.
 |
| The sun and sea, how I miss them both! |
I had a bit of an odd shaped rock to work with so I turned it into a ice cream cone.
 |
| Drawing the cone |
I drew the outline with a black 853 OHP marker and then coloured it in with yellow and white paint markers.
 |
| I used these pens for my ice cream rock |
When the paint had dried I added raspberry sauce with my pink Artline Supreme marker and the waffle pattern to the cone with an orange 853 OHP pen.
My eldest daughter drew a pair of flip flops on her first rock and wrote a fun message on it!
 |
| Strawberry and blueberry ice cream |
My youngest thought my vanilla ice cream was boring so she drew her own with strawberry and blueberry scoops instead!
 |
| I love ice lollies |
She also made this I love ice lollies rock, it's a little abstract looking but she really enjoyed drawing it!
 |
| Can you dig it? |
Our last rock has a bucket and spade on it, my eldest girl painted the sand with a yellow paint marker and then drew the rest with the 853 OHP pens.
 |
| Written on the back of each rock |
On the back of each rock we have written #ArtlineRocks, share online, keep or rehide so anybody who finds one will know what to do with it.
 |
| Our full set of summer rocks |
Here is the full set of our summer themed rocks! I am going to varnish them this week and then put them away until our planned trip to the beach.
Tips for hiding rocks at the seaside
If you are going to make your own rocks and are thinking about hiding them at the seaside here are a few tips for you....
Do not hide your rocks on the sand. If the sea comes in too far then your little work of art will be wash away and may never be seen again!
You could hide them on the wall along the beach if the weather is good and the sea is calm.
 |
| Hiding rocks on rocks! |
If there are rocky walkways or piles of rocks near the beach but not the water then these are great places to hide your stones if you want them found quickly. The brightly painted rocks standout beautifully against the natural stone! If you want to make finding your rocks a little trickier then try hiding them up higher instead of low to the ground.
 |
| Standing out against the rocks |
Some other good places you can hide your rocks are parks, cliff tops, benches and the ornamental gardens and flowerbeds that are usually spotted around beaches and seaside resorts. I like to hide stones among the flowers and as long as you have varnished them they will still look great when someone finally spots them nestled in there.
Please let me know if you decide to make some of your own #ArtlineRocks, I would love to see them!


No comments:
Post a Comment