Monday 24 December 2018

Artline Monday - Christmas Eve craft

Christmas Eve is probably one of the most exciting days of the year so sometimes it is hard to get your young children to calm down especially in the evening.  I mean I don't blame them, I also get super excited about Santa being on his way but if you want to help them wind down a little before bed you could get them to make their own treat plate for Father Christmas.

There are two ways you can do this craft, either with a plain ceramic plate which you can keep to use each year (and it would make a lovely Christmas keepsake) or with a paper plate and it could become part of your Christmas Eve traditions to make a new one together each year.

Supplies for this Christmas Eve craft

If you are going to be using a ceramic plate you will need some of these pens for the design:

Artline Supreme permanent markers
Artline Supreme metallic markers
Artline 853 OHP pens
Artline 90 permanent markers

All of these pens work great on the ceramic surface!  We used a selection of them to make our own plate for Santa's treats.

Signing her name with the Artline 853 OPH pen

Summer drew Santa & I added the holly
 
All set for Christmas Eve

If you are using a paper plate then you can use any pens and markers and just get started designing them.  Here are some ideas Summer and I came up with last week...

Created by Summer age 7

My "a place for everything" plate design

Merry Christmas plate

Any festive scene or a drawing or message for Santa will be great.  The longer the plate takes to make the more time the children will have to sit still and relax so some helpful suggestions from you along the way could help to extend the craft! *wink wink*

I just want to take the time now to wish you all a very happy Christmas and I hope you have a wonderful time over the holidays!


Monday 17 December 2018

Artline Monday - Christmas card craft

I can't believe Christmas is nearly here but there is still time to squeeze in another craft!  This week I have been making some sweet Christmas cards using my Artline pens.

Sheets of card, pens and markers

For this craft you will need:

  • Two sheets of card per Christmas card
  • A selection of Artline pens and metallic poster markers
  • Glue
  • Sequins 

The front of the card is quite simple because the inside is where we get really creative!  I drew a reindeer's face and antlers with baubles dangling off them using my Supreme brush markers and you can copy this design easily or come up with your own festive doodle. 

The front of our card

For the inside you will need your second sheet of card.  Fold it in half and then draw half a snowflake along the folded edge.  The snowflake is going to pop out of the card when it is opened so when you draw yours try to have two flat points which is where the flake will stay connected to the card.  I have marked mine with some small lines so you can see what I am talking about.

Draw half a snowflake

Carefully cut around the snowflake with either scissors or a craft knife.  Make sure you don't cut all the way around though, you want to leave your flat points alone which is another reason why I marked them out on mine.

The side you drew on is going to be the back of the inside of your card, open it out and gently pull your snowflake upwards so it stands away from the card.  You need to refold the line down the middle of the snowflake in the opposite direction so when you close the card it will shut with the flake sticking outwards instead of being flat inside it.

I coloured in my snowflake with a metallic blue poster marker and then I glued some sequins around it too.   Make sure you leave yourself enough room to write your season's greetings on the inside! 

Metallic blue snowflake

I opened up the card I drew the reindeer on earlier and coloured in a large section with my silver Artline 900XF pen and added some metallic pink and gold spots with my poster markers.  

Adding an extra touch of sparkle

Then I glued all around the edges of the reindeer card and stuck my white piece with the snowflake inside it to make one whole Christmas card.  Now when I open it up you can see my pop up snowflake with a nice silver pattern behind it for that extra touch of sparkle and festive fun.

Inside the card

I'm really happy with how the card turned out, I like how simple the front looks and then you get a nice surprise when you open it up!

Let me know how you get on if you have a go at making your own please, I'd love to hear about it!

Monday 10 December 2018

Artline Monday - Christmas envelope art ideas

I love sending (and receiving!) Christmas cards, sometimes they are the main contact I have with some of my far flung family and friends over the year so I like to make them look as nice as possible before I send them out.  Last year I wrote about Christmas card calligraphy and this year I am building on that with some envelope art you can do to make your cards look extra special.  

All set for some envelope art

I have four different designs to share with you can today, some are quick and simple to do and others will take a little while longer.  It just depends on how much time you want to spend on them and how confident you are drawing on the envelopes.

Classic red and gold theme

My first design is a classic Christmas theme, I used my favourite gold Artline calligraphy pen to write the surname of my recipient and then drew some different styles of snowflakes in varying sizes with the Artline 900 and 999XF metallic pens.  I wanted to make the surname standout even more so I drew around it with my black fineliner to give it some depth.  Snowflakes are pretty easy to draw but if you don't know where to start you can copy mine or google "how to draw snowflakes" for some step by step instructions.  

If you don't want to write or draw directly onto the envelope with your pens (in case you make a mistake) you can do it lightly with a pencil first and then go over it in ink when you are happy with how it looks.  

Snowy theme

This second design can be done really quickly but I think it looks great!  I painted a layer of snow along the bottom of the envelope with a white poster marker and then drew two circles for the snowman.  I added some coal buttons, a hat, eyes and a smile with my black fineliner and a carrot nose, scarf and twig arms with my Supreme pens too.

I used the poster marker to write the surname of the family this card is going to followed by their address with the fineliner and then covered the rest of the space with falling snow.  I have left a small space clear for the postage stamp as I want to make sure it is stuck securely to the envelope when I send it.

Christmas decoration theme

The third design features lots of Christmas decorations dangling down along the top edge of the envelope.  I used my gold star stamper for a couple of the ornaments and then drew the rest by hand.  All the pens and poster markers I used to colour things in were metallic for that extra Christmassy feel!

After I had drawn all the decorations on this envelope I made a mistake on the name so instead of throwing it away and starting over again I adapted the design and corrected it by colouring around the name (and hiding my error) with the purple Supreme pen.  If you made a mistake take a minute to look at the envelope and see if you can think of a way to salvage it using the products you have.  If all else fails you could always stick a white address label over it and write on top of that instead.   

Fairy lights theme

My final design is my favourite one, I absolutely love fairy lights so I covered my envelope with a string of them.  I started off by drawing the twisted wire around the top and bottom edges and then added the light bulb shapes.  I chose traditional colours for the bulbs and coloured them in with my Supreme brush markers and a yellow paint marker.  I used the paint marker because the envelope is a grey/silver colour and I wanted the yellow to really standout against it.  I also used my metallic silver Supreme pen to colour in the bases that attach the bulbs to the wire.

After I wrote the surname I added an extra string of lights to make it look like the name was part of the wire connecting the fairy lights together.  The whole thing took me less than five minutes so you should be able to whizz through a stack of cards with this design in next to no time!

So have I inspired you to have a go at some envelope art?  I would love to see it if you do have a go!

Thanks for stopping by!


Monday 3 December 2018

Artline Monday - Make A Gift Day

Today is Make A Gift Day so it's the perfect time to share another Christmas craft with you!  This time I am making a festive snow scene for my neighbour's daughter who is obsessed with dinosaurs but you can pop whatever you like inside yours and the method will be the same.

Gathering my supplies

For this craft you will need:

  • A clean empty jar with a lid
  • Some fake snow or white or silver glitter
  • Items to create your scene like small toys, pine cones or Christmas decorations
  • Artline 900XF metallic pens
  • A white Artline poster marker
  • A piece of foam or a small sponge

I found this dinosaur in the bottom of a toy box in my children's room, he looked a little worn and unloved so I transformed him with my metallic silver Artline 900XF marker and now he looks much better!


Colouring in the dinosaur toy

I wanted to make my pine cone look a little special too so I added some gold highlights to the tips of it.

Adding gold highlights

Unless you want to be covered in marker it is a good idea to set anything you have coloured in to one side and leave them to dry for a while.

Waiting for the ink to dry

While they were drying I used the lid to draw a circle on my sponge so it would be roughly the same size as the mouth of my jar.  The sponge is going to raise my scene so it will be higher up in the jar than if I just glued everything directly to the bottom of the lid.

Drawing around the jar lid

Then I cut out my circle and painted the top of it white with the Artline poster marker so it would look a little snowy.

Painting the sponge

I used super glue to stick the sponge to the inside of the lid....

Gluing the sponge inside the lid

.... and then glued the tree, pine cone and silver dinosaur on top of the sponge.

Glue your items to the sponge to create your scene

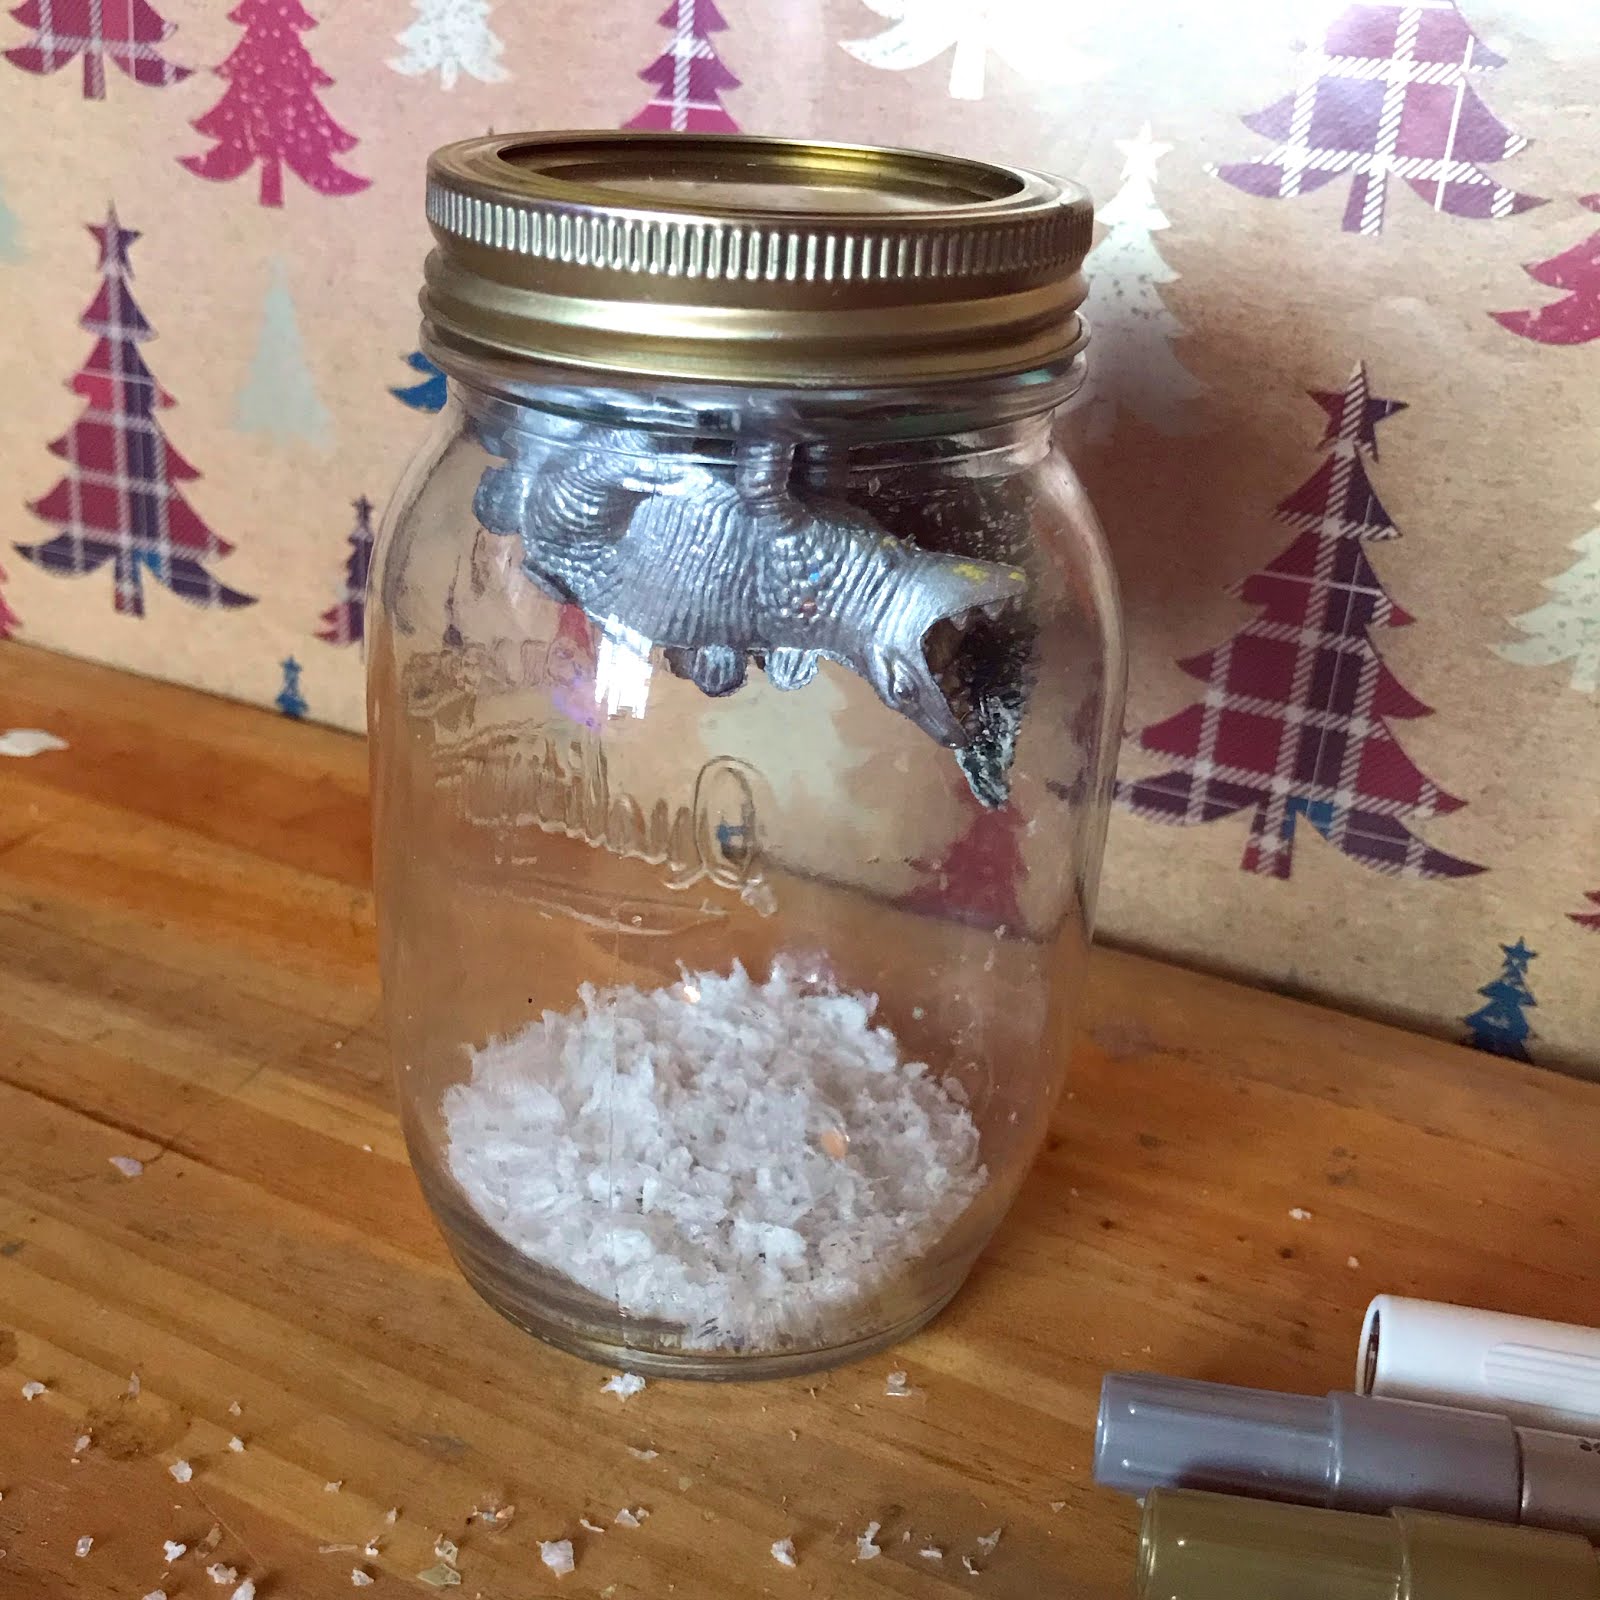
I added some fake snow inside the jar, the amount you can see in this photo was too much so I had to take about half of it back out!

Add your fake snow, you'll need less than you think

Once the glue had dried and my figures were secure and in place I screwed the lid back onto the jar.

Screw the lid onto the jar

Flip the jar over and you have your snowy scene!

The finished snow scene

You can make these scenes with any size jar, from tiny mini ones to huge ones!  You just need to make sure whatever you glue to the lid will fit inside the jar and through the mouth of it before you start.  

If you wanted to make them into traditional snow globes you would just need to add some water and a spoon of glycerine to help the glitter float around.  You should also glue the lid shut so no one could open the jar again once it had been filled. 

Now I know how well the Artline 900XF metallic pens work on such odd surfaces I keep thinking of all the things I could use them on to make more Christmas decorations!  If I find anymore small forgotten toys I just might colour them in too, thread them with some ribbon and hang them on my tree!