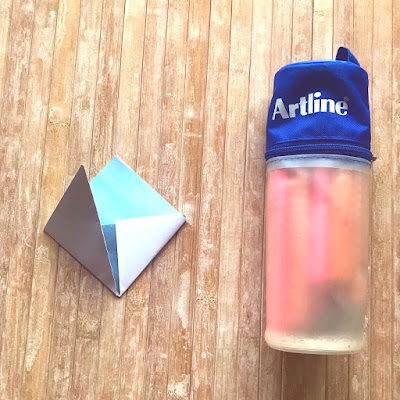
February is fast approaching and with it comes the first half term break of the year and it is also Library lovers month so I thought I would combine these two things and show you a bookmark you can make with your children over the holiday and then maybe you could visit your local library and take out some books to read together (using their fab new bookmark too, of course)!
 |
| Rainbow cloud bookmark |
To make this cute page marker you will need:
- Two pieces of paper
- A piece of thin cardboard
- Scissors and glue
- A black marker like my Artine 70 pen
- pens or markers in rainbow colours
The first step of this craft is to take one sheet of your paper and cut it into a square, mine is 6 x 6 inches but you can go a little bigger or smaller. You can use plain white, coloured or patterned for this part, it really doesn't matter.
Once you have your square it is time to start folding it, copy the steps pictured below.
 |
| 6 x 6 inch square |
Bring two diagonally opposite corners together to form a triangle and run your finger along the fold.
 |
| Triangle |
Keep the folded edge at the bottom and bring the right corner up to the top centre point.
 |
| Fold right corner up to the top centre point |
Then repeat this step with the left corner so you are left with a diamond shape.
 |
| Fold left corner up to the top centre point |
Unfold both corners back down so you end up with the triangle shape again.
 |
| Unfold corners to make a triangle again |
Take one side of the paper from the top centre point and fold it downwards towards the bottom edge of the triangle. Leave the second piece still pointing upwards.
 |
| Fold top centre point down to the bottom edge |
Then take the right bottom corner and fold it upwards again, like we did to make the diamond shape before.
 |
| Bring the bottom right hand corner upwards again |
Fold the excess from the bottom right hand corner (that we have just brought upwards again) down into the pocket we are creating.
 |
| Tuck the excess into the pocket |
Do the same with the left hand bottom corner....
 |
| Bring the bottom left hand corner upwards again |
... and tuck the excess inside the pocket again.
 |
| You should now have something that looks like this |
Now you have your basic bookmark and it's time to decorate it!
 |
| Place your bookmark onto your sheet of card |
The bookmark sits on the top corner of the page you want to mark so make sure you turn yours around so the pocket is at the top (see the photo above).
Place your bookmark onto the sheet of card and draw a cloud shape around the top half of it, the cloud needs to be just slightly bigger than the pocket.
 |
| Cloud shape |
Remove the bookmark and finish drawing the cloud, then add a smiley mouth and a pair of eyes and cut out the cloud carefully with a pair of scissors.
 |
| Glue the cloud onto your bookmark |
Glue the cute cloud shape onto the outside of the pocket of your bookmark.
 |
| Cloud bookmark ready for it's rainbow |
The last thing you need to do is make the rainbow. Take your second sheet of paper and cut out a square of it that is a little bit smaller than the bottom of your cloud.
 |
| Rainbow coloured pens and markers |
Grab your Artline colours and fill the whole square of paper with stripes of red, orange, yellow, green, blue, purple and pink.
 |
| Drawing the rainbow |
I placed a piece of scrap paper under the square I was colouring in so I wouldn't get any paint or ink on my desk and then I could go right up to and over the edge without making a mess.
 |
| All the colours of the rainbow |
Once the rainbow is finished all you need to do is glue it onto the bookmark.
 |
| Gluing along the top edge of the rainbow |
Place the glue along the top edge of the rainbow and then stick it to the underside of the cloud shape on your bookmark.
 |
| Ta-da! |
When the glue has dried your bookmark is ready to use! I think it looks so sweet perched on top of the pages of our book!
 |
| Our finished bookmark |
Now you know how to make the base of this bookmark you can design your own creation to add on top of it, how about a rocket shooting out flames or a silly face? All you need to do is fold your paper into the pocket shape and then draw whatever you like on a piece of cardboard instead of the cloud to make something new!
Thanks for stopping by!

No comments:
Post a Comment