Monday, 28 January 2019

Artline Monday - Cute bookmark craft

February is fast approaching and with it comes the first half term break of the year and it is also Library lovers month so I thought I would combine these two things and show you a bookmark you can make with your children over the holiday and then maybe you could visit your local library and take out some books to read together (using their fab new bookmark too, of course)!

Rainbow cloud bookmark

To make this cute page marker you will need:

  • Two pieces of paper
  • A piece of thin cardboard
  • Scissors and glue
  • A black marker like my Artine 70 pen
  • pens or markers in rainbow colours


The first step of this craft is to take one sheet of your paper and cut it into a square, mine is 6 x 6 inches but you can go a little bigger or smaller.  You can use plain white, coloured or patterned for this part, it really doesn't matter.  

Once you have your square it is time to start folding it, copy the steps pictured below.

6 x 6 inch square

Bring two diagonally opposite corners together to form a triangle and run your finger along the fold.

Triangle

Keep the folded edge at the bottom and bring the right corner up to the top centre point.

Fold right corner up to the top centre point

Then repeat this step with the left corner so you are left with a diamond shape.

Fold left corner up to the top centre point

Unfold both corners back down so you end up with the triangle shape again.

Unfold corners to make a triangle again

Take one side of the paper from the top centre point and fold it downwards towards the bottom edge of the triangle.  Leave the second piece still pointing upwards.

Fold top centre point down to the bottom edge

Then take the right bottom corner and fold it upwards again, like we did to make the diamond shape before.

Bring the bottom right hand corner upwards again

Fold the excess from the bottom right hand corner (that we have just brought upwards again) down into the pocket we are creating.

Tuck the excess into the pocket

Do the same with the left hand bottom corner....
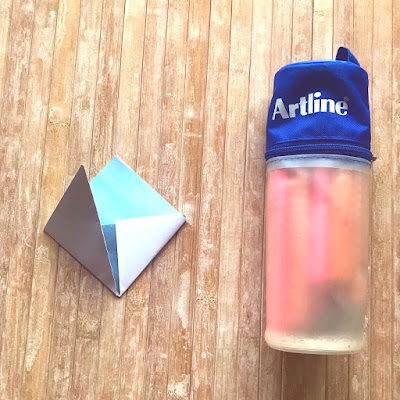
Bring the bottom left hand corner upwards again

... and tuck the excess inside the pocket again.

You should now have something that looks like this

Now you have your basic bookmark and it's time to decorate it! 

Place your bookmark onto your sheet of card

The bookmark sits on the top corner of the page you want to mark so make sure you turn yours around so the pocket is at the top (see the photo above).

Place your bookmark onto the sheet of card and draw a cloud shape around the top half of it, the cloud needs to be just slightly bigger than the pocket.  

Cloud shape

Remove the bookmark and finish drawing the cloud, then add a smiley mouth and a pair of eyes and cut out the cloud carefully with a pair of scissors.

Glue the cloud onto your bookmark

Glue the cute cloud shape onto the outside of the pocket of your bookmark.

Cloud bookmark ready for it's rainbow

The last thing you need to do is make the rainbow.  Take your second sheet of paper and cut out a square of it that is a little bit smaller than the bottom of your cloud.

Rainbow coloured pens and markers

Grab your Artline colours and fill the whole square of paper with stripes of red, orange, yellow, green, blue, purple and pink.  

Drawing the rainbow

I placed a piece of scrap paper under the square I was colouring in so I wouldn't get any paint or ink on my desk and then I could go right up to and over the edge without making a mess. 

All the colours of the rainbow

Once the rainbow is finished all you need to do is glue it onto the bookmark.

Gluing along the top edge of the rainbow

Place the glue along the top edge of the rainbow and then stick it to the underside of the cloud shape on your bookmark.

Ta-da!

When the glue has dried your bookmark is ready to use!  I think it looks so sweet perched on top of the pages of our book! 

Our finished bookmark

Now you know how to make the base of this bookmark you can design your own creation to add on top of it, how about a rocket shooting out flames or a silly face?  All you need to do is fold your paper into the pocket shape and then draw whatever you like on a piece of cardboard instead of the cloud to make something new!

Thanks for stopping by!


Monday, 21 January 2019

Artline Monday - 2019 memory keeping in your Bullet Journal

If you want to focus on the positive things in your life this year then this bullet journal idea will help you do just that!  If you don't already have a bullet journal all you need is an empty notebook and to read my post about how to get started, then come back here.  If you have already got your journal set up let's get on with this...

Memory keeping Bullet Journal spread

The idea behind this spread is to create a space to record your favourite thing/s about each month.  This could be the best book you read or a memory you want to keep, it could be a quote you heard and liked or just a movie you watched and really enjoyed.  You can use the space for whatever you want to remember and then at the end of the year you will have a record of all of your favourite things about 2019.

I wrote "2019 Favourites" at the top of my two pages using an Artline Supreme metallic marker (a sparkly pen for a shiny new year) and a little description about what I will be using the pages for.  Then I drew 12 boxes with my fineliner, leaving a space to add the first three letters of each month.  I also wanted to add some extra colour and sparkle to the layout so I gave each box a silver shadow with another metallic marker.

The last thing I did was add a quote along the bottom of my pages, I went with "This is your year to sparkle!" as it makes me feel inspired and ready to face the next twelve months!

I love using the Supreme metallic markers because of how shiny they are, you can see the silver shimmer in the ink in the photo below, they really do catch the light and sparkle!

Metallic shimmer

If you are more of a visual person you could adjust this layout a little and spread it out over four or six pages to give you bigger boxes and then you could add your favourite photographs for each month instead, I think that would be pretty neat!

Please let me know if you do give either of these ideas a go, I would love to see how it turns out!

Monday, 14 January 2019

Artline Monday - Self care ideas

January is a great time to get into some new good habits and indulging in some self care is definitely on the list of things I want to do more regularly this year.  I realised at the end of last year that I hadn't really been looking after myself or taking the time to do the things I enjoy so I decided to change that in 2019.  If you feel like you have been neglecting yourself a little then I have some easy and inexpensive ideas for you to try!


Self care ideas - created with Artline pens

If you are super busy then it can be hard to find the time to look after yourself and recharge your batteries but if you can squeeze in one of these activities once a week or even better daily then they should help you feel a little more pampered or refreshed.

Relax and unwind

Have a shower or bath

Whichever you prefer or can fit into your day, use a squirt of your favourite shower gel and wash your worries away!

Movie night

When was the last time you sat through a whole film without keeping one eye on your phone and scrolling through Facebook or other social media?  Grab some snacks, put your mobile out of reach, turn off the lights and pop on a film.  

Music

Play your favourite song or album, sing and dance along if the mood takes you.  There's nothing like escaping into music to bring a smile to your face.


Be kind to yourself

Read

Discover a new book or revisit an old favourite, take the time to sit and devour a chapter or two.  A good book is like a mini holiday if it sweeps you away to a different world or life.

Take a nap

Honestly naps are the best! Twenty minutes or half an hour curled up on the sofa is my ultimate treat.

Enjoy your favourite hot drink

Grab a cup or giant mug of your favourite hot drink, sit down, sip slowly and relax, warm your hands and your soul.  

Get warm and cosy

This is just for the next few months while it is still pretty cold outside, invest in a pair of think, warm socks to keep your feet nice and toasty and wrap yourself in a jumper or cardigan to chase away the chill of winter!  If you are at home you can add a blanket around your shoulders or a dressing gown, bonus points for a hot water bottle too!

I used lots of Artline products to create this spread including finelinersmetallic markers and Stix drawing and brush pens, lettering and doodling are another couple of things I like to do during my "me time" so this was a fun way to spend my morning!  

If you would like some more ideas to help you relax or battle through the rest of January then you can read my Ways to relax and January motivation posts for a bit of inspiration. If you fancy taking up a new hobby then check this post out for some ideas as well.


Monday, 7 January 2019

Artline Monday - How to start planning

So it’s a brand new year and the perfect time to get organised!  If you got a lovely new planner for Christmas or treated yourself in the sales then I have some tips for you today to help you get started on your planning journey.

My planning tips - created with Artline pens

No matter what kind of planner you use the basics of planning are the same: 

  • Write down any important dates and reminders 
  • Take time to check and use your planner daily 
  • Follow through with your plans (it's no good writing things down & then not doing them)
  • Utilise to do lists 
  • Colour code

For this post I will be showing you how I plan my month but you can also use these tips for planning your week or day too.  


A blank month ready to be filled in

The very first thing I do is decide what colours I am going to use for my colour coding, having a set colour for certain things means it is easy to spot the information I need even when there are a lot of notes on my pages.  

For January I am using dark blue for birthdays, light blue for my children, royal blue for my blog, grey for me, black for my husband and a blue highlighter for any bills or payments I need to make.  I made a note of this in the long, thin box down the right hand side of my page but as the month goes on I usually remember what each colour is for anyway.  Then it was time to fill in the month with my important dates and reminders.  

All my dates and reminders

I also add any money that will be coming out of my account by drawing a thick line with my highlighter and writing over it which bill it is for.

Adding bills & payments with a Supreme highlighter

I like to use a little bit of space to write down my goals for the month (or week or day depending on what I am planning) so I used a Supreme brush marker to create my own header for this and then added them to my notes section.   

Goals for the month

I also made another header for my monthly to do list.  These are usually things that I need to get done over the course of the month but not on a specific week or day.  On my weekly pages I have daily to do lists that include things like tasks and errands.

I use to do lists to help me achieve my big goals too.  Sometimes a goal can seem really far away and hard to reach so I try to break it down into smaller steps that I can complete and it feels less scary and more manageable doing it this way.

Monthly to do list

Now I have all this information in my planner I need to open it up and check it daily!  Every night before I go to bed I look inside to see if I need to prepare anything for the following day and then I check again in the morning to make sure I know what I need to do or where I need to be.  I also need to add more notes and reminders as the month goes on and things change or crop up, setting aside 5 or 10 minutes a day to do this really helps me to keep on top of everything!

My month so far

If this post has inspired you to start planning but you don't have a diary or planner then you can use a notebook and pen to get organised, check out my Bullet journal basics post for some more ideas and information.