Monday 25 March 2019

Artline Monday - Mother's Day cards

It is Mother's Day this Sunday but don't worry if you're not prepared for it yet!  Last week we made a Mother's Day gift and today I'm going to show you a couple of simple but sweet card ideas I found on Pinterest.

Card making supplies

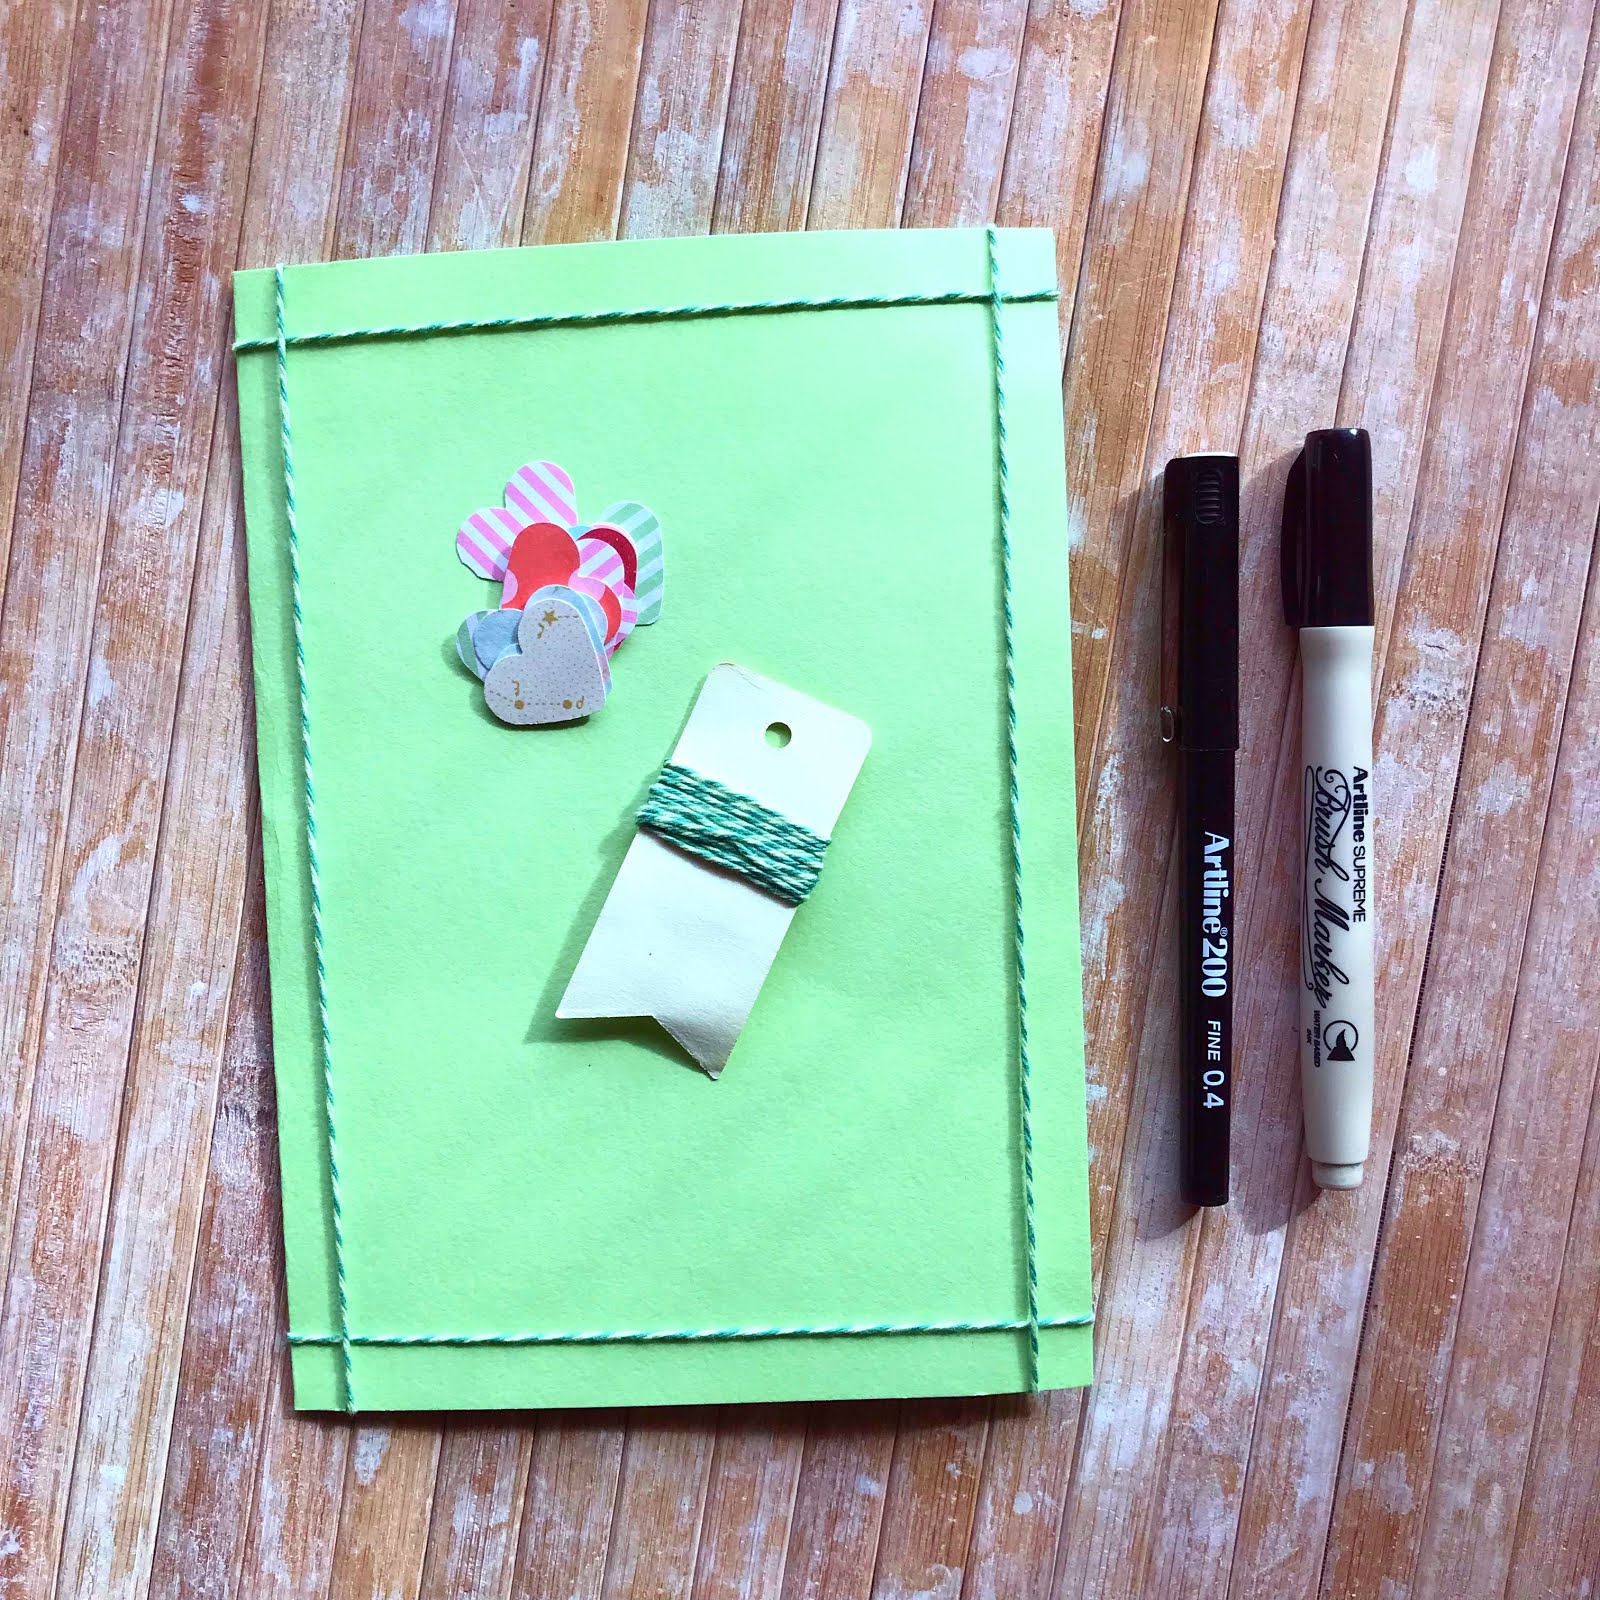
For the first card I folded a piece of A4 card in half and attached some green twine around the edges of the front of it, this gives the card a little bit of texture and makes it look more interesting.  If you don't have any twine then you could use some ribbon or washi tape instead or just skip this step altogether.

Making a basic card shape

I used a punch and some patterned scrap paper to make 15 heart shapes, then I wrote the letters for HAPPY MOTHER'S DAY onto the hearts using my black Supreme brush marker.

Writing my message

Once I had my message I played around with how I wanted to space the hearts out on the card, when I was happy with how they looked I glued them into place.

Drawing the strings

The last step for this card was to turn the hearts into a bunch of balloons by drawing strings to hold them together using an Artline 200 fineliner. 

The finished card

For the second card I used another piece of A4 card folded in half.

Card and Artline pens

Starting in the bottom left hand corner and working my way up towards the top right hand corner I wrote "happy Mother's Day" in cursive with my Artline pens

Happy Mother's Day

Then I added a large 3D butterfly sticker to the end of my message, as if it was the path the butterfly had just flown.  The card looked a little plain so I decided to use another couple of small butterfly stickers on it for some extra decoration.

3D butterfly stickers

I'm happy with how both cards turned out, I think they look cute and I would be happy to receive either of them this weekend!

Two cute and easy to make cards

Of course there is still time for you to pop out and buy your mum a card from the shops but I always think that a handmade card is nicer as it shows you've spent time making something to make them happy.  What do you think?

Thanks for stopping by!


Monday 18 March 2019

Artline Monday - Mothers Day gift

Here is a quick reminder that it is Mothers Day on the last Sunday of the month and if you are short on ideas for what to get your lovely mum then how about making her a gift?

My youngest daughter and I have been making a present for my mum over the weekend, it is the perfect craft for little hands and there wasn't too much mess afterwards which is always a bonus in my book!


Supplies


For this craft you will need:

  • A glass candle jar 
  • A clean sponge
  • Some Artline poster markers
  • A small candle or tealight to go inside the jar

I brought this candle jar and holder as a set from Home Bargains, I thought it was sweet but needed some colour to make it a little more fun.  You can either buy something similar or just use a plain glass jar.

Once you have got your candle jar the first thing you need to do is select which colours you would like to use to decorate it, we chose red, pink, yellow, blue and white.

Adding our colours to the sponge

Use your poster markers to add sections of colour to the sponge, we did stripes but you can fill it in however you like.

Use the sponge to add colour to the jar

Then press the sponge onto the glass adding the colour onto the jar.

Our colourful jar

Cover the whole jar with the paint on the sponge.  Leave it to dry for about 20 minutes and then if you are happy with it put it to one side, if you want to add more colour/s then just put extra paint on the sponge and layer the colours on the jar.

My mum loves pink too

We decided to add some pink to the metal holder too, the poster markers work on lots of different types of surfaces so they are great for all kinds of craft and art projects.

Colour coordinated jar and holder

The candle jar looks more interesting in the daylight now it is not just plain glass but it looks really great in the evening when the candle is lit and it shows off the colours and patterns we created with the sponge.  I think my mum is going to really like it!

With the candle lit

Last year we made personalised mugs for Mothers Day, you can check that post out here and the whole of March is National Craft Month so if you're looking for things to do you can find lots of arts and crafts posts here.

Thanks for stopping by!


Monday 11 March 2019

Artline Monday - Plant a flower day

Have you heard of Plant a flower day?  It is a great way to celebrate the upcoming spring and encourage people to try their hand at gardening.  It falls on the 12th of March each year and I thought it would be nice to get involved and test out my green thumbs!


Getting ready to plant some flowers

Before I started messing around with potting soil and seeds I wanted to decorate the terracotta pot I was going to use.  I knew it would take a while for my seeds to grow into a plant and flower so I wanted to add some colour to it for me to enjoy while I waited.

I tested out lots of different Artline pens on the bottom of the pot so I could see which ones stood out the best against the terracotta colour and decided to use my metallic poster markers as they went on smoothly and looked great.


Painting the top of the pot

I started out with the metallic blue colour and painted the top part of the pot...

Painting the edge of the pot

...and went around the edge of it too.

Adding more colour

Next I taped off sections of the pot with some skinny washi tape and filled them in with my silver, pink and blue poster markers.

Creating a pattern

The colours I chose kind of remind me of those Easter eggs you can get with pastel foil wrappers on them so they feel very spring like to me!

Finishing the design

The poster markers dried very quickly on the pot so it was easy to paint the whole way around it without worrying about smudges or ruining the sections I had already done.  Once I'd finished painting it I removed the strips of washi tape to reveal nice clean edges and stripes of terracotta to make my pattern.

Preparing my lolly stick

I thought I would colour coordinate my lolly stick with the pot so I painted it metallic blue as well and then wrote the name of the flowers on it with my trusty Garden marker.

Planting the seeds 

Once the pot was finished I filled it up with soil and planted some seeds, I really hope they grow!

My pretty pastel pot

While I'm waiting for Mother Nature to do her thing I've added a little pastel purple cactus garden ornament to the pot and one of my ladybird painted rocks just to make it look a bit more interesting.

A little ladybird is guarding my seeds

Last summer I decorated some outdoor garden pots and planters using Artline poster markers and they still look great now (even after being outside all over winter!) so if I need to move this pot outside once the seeds have sprouted I know it can withstand all kinds of weather!   

Will you be planting any flowers tomorrow?  Fingers crossed for a warm, sunny day!  


Thursday 7 March 2019

World Book Day craft with Artline pens

As today is World Book Day I really wanted to make something special to celebrate!  I absolutely love to read and think a day dedicated to encouraging children and adults to pick up a book and delve into new worlds is great fun.  

Memories box and Artline pens

Anyway, I was pottering around the shops last week looking for some crafting bits and pieces when I spotted this wooden memories box and thought it could look just like a book!  Even the hinges on the side of it looked like fancy patterns on the spine of an old book so I decided to buy one and turn it into a story themed keepsake box.


Alice in Wonderland

The first thing I did was design the front cover of my "book".  I cut out a piece of paper the same size as the photo area in the front of the box and then drew Alice from Alice in Wonderland using my Artline Stix drawing and brush pens.


Painting the cover

Next I painted the outside of the wooden box with a blue poster marker to look like the cover of a book and then left it to dry for about 15 minutes.  


Painting along the edges

I also painted along the edges of the box to complete the book look....

Adding the finishing touches

... and then coloured in the inside edges using an Artline Supreme brush marker as the nib was finer and easier to use on the smaller surface.

The spine of my "book"

Once all the paint was dry I added my drawing into the photo area.  I put it in upside down so it would look like Alice when she was falling down the rabbit hole which is why I drew her hair the way I did.

My Alice in Wonderland themed keepsake box

Doesn't it look just like a book?

Things that remind me of Alice in Wonderland

Now what would you put inside this keepsake box?  I have a few things that remind me of Alice like a blue flower hair clip the same colour as her dress and a red rose brooch.  I also have a couple of vintage style cards that I was given a long time ago which I kept because the girl and the rabbit on them gave me Wonderland vibes.  Lastly I have two pins with quotes on them from the book which I need to keep safe when I'm not wearing them because I would hate to loose either them!

Kept safe inside the box

The great thing about this is you can make it into any book you or your children love!  If you don't want to draw your own cover you could print off a picture instead or use a page from a colouring book and if you wanted to change the theme at any time it's as simple as changing the picture to something else!

Enjoy the rest of World Book Day and I hope you find some time today to sit down and read either an old favourite or a discover a new one!

See you again soon!


Monday 4 March 2019

Artline Monday - International Scrapbooking Day

Today is International Scrapbooking Day so it's the perfect time to get crafty and creative while recording your memories!  

Scrapbook and pens

It has been years since I have done any scrapbook projects but knowing this day was coming up I felt inspired to get started again!  I don't have any special kits anymore but I do have plenty of papers and embellishments like tags, note cards, twine and washi tape so I decided to use these to make my first spread. 

Making heart decorations

I wanted to make some decorations using my Artline pens so I sorted out some different kinds of paper and a stencil.  I drew heart shapes onto linen card, watercolour paper and on a page out of an old book and then coloured them in using my Supreme highlighters and brush markers.

Blending the inks

Then I used a wet paint brush to blend and lighten the inks.


Watercolour hearts

Hearts on a page from a book

Once the papers had dried completely I cut them out carefully and then it was time to make my spread.

My heart embellishments

I started by adding strips of washi tape to my pages and then glued in a photo, some of the hearts and a note card for me to record my memories on.

Starting to decorate my pages

I used my brush marker to write Family on a little yellow tag and tied some matching twine to it before I glued it into place.

Family tag with matching twine

Then I arranged the rest of my hearts around the pages until I was happy with how it looked and glued them down too.

One side of my scrapbook spread

I love how each set of hearts have turned out differently depending on which kind of paper or card I used to make them.  I think the watercolour ones are my favourites but they all add a nice splash of colour to my layout.

The finished design

Are you an avid scrapbooker?  Do you have any hints or tips for me as I fill in this new book, please let me know!  

If you've never done any kind of scrapbooking do you fancy giving it a go?

See you next time!